Monday 19 December 2011

How to Use Hologram Effectively


The first time the player uses hologram he sends it across the bridge. The second time after a lapse in fighting he aims the hologram to the floor next to where he is standing. The players then runs across the bridge in a straight line pretending to be the hologram. After the enemy dismisses him as a hologram he opens up fire and kills the other team.

Genius.


This next video uses the hologram to confuse the enemy and claim a nice double kill. Good work.

Saturday 17 December 2011

How To Use Camouflage Effectively


In the first video, the players uses camo along with a sniper rifle to insta- kill his victim. A great tactic for all camo users is to grab a power weapon like this or the rockets for a quick easy point.


In the second video an elite player hides and waits, lying in ambush on two opponent. One of which he successfully assassinates. (also it shows that people don't look at their radar enough)

Hope you enjoy the videos. And thanks to the guys who posted them nice work.

Friday 16 December 2011

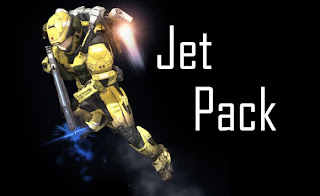
How To Use Jet Pack Effectively


This video shows just how powerful JetPack can be if used correctly. Near the beginning he flew into the air and used the range of his pistol to get the kill. Stole the rockets. Flying up over the building is a shortcut to where he was able to view the whole map. Although he missed with the rocket launcher, you can see how effective it can be when shot from the air to the ground.

Thursday 15 December 2011

How To Use Sprint Effectively


Here is an awesome video from machinima.com thanks for dong this one. It nicely explains a couple of uses for sprint and how to use this armour ability effectively without wasting or running (pun) down the meter needlessly.

How To Use Armour Lock Effectively


In this short 30 second clip you will see just how to use armour lock effectively. The player uses armour lock to destroy a ghost who charges directly at him. The ghost explodes and he gets the kill. Then a warthog tries to run him how, the warthog gets flipped and stunned.

Can you see how simple but effective armour lock can be when used correctly for defending, but then how that defence can be turned around into an offensive power/ability. One that can tip the battle in your favour.

Try doing this yourself, just to see how easy it is to kill a charging vehicle.

Armour Abilities: How They Work - Part 3

As everybody knows by now, when Halo Reach hit the shelves back in Sept 2010, and having sampled the beta myself in May 2010, the newly included armour abilities were introduced into the game.

The idea behind armour abilities is to give a player a certain advantage in battle. And to fit in with the story of Halo Reach, the planet Reach was primarily a military fortress world where new technology was being developed. Hence we get these armour abilities. From the next game in the series point of view the armour abilities are a more refined version of the deployable, and 1-time use, equipment from Halo 3.

Now, there are several armour abilities you get to choose from when you begin a match in Halo Reach. These armour abilities are preset by the gametype and match you are playing.

The armour abilities include:

  • Sprint
  • Evade (elites)
  • Armour Lock
  • Jet Pack
  • Medic (drop shield)
  • Camouflage
  • Hologram


    We'll take each armour ability at a time, describing how it works dynamically, and then a brief note on how to use it to full effect.

    Note: all armour abilities have a cool down time once used, which replenishes automatically, some take longer than others. And you get the choice to switch which ability you want to use each time you respawn. So you can keep changing them each time if you want.

    Copy and paste over. In part three of this article we will look at the last two of the Armour Abilities. We'll talk about Camouflage and Hologram.


    CAMOUFLAGE


    Camouflage is an armour ability that renders your character somewhat invisible to the eye. When activated two things happen, you become invisible and the radar gets jammed. The reason for this is for balance so even though you may not be seen, an enemy will know you are nearby.

    Things to know about Camouflage. When pressed the ability meter will begin to drain. The rate of drain depends on how fast or slow your character is moving. Camo is more effective when moving slowly and drains the meter much slower. You can fire when camouflaged but the more you do the more visible you will become.

    Using camouflage can work well with melee weapons like the sword or hammer, or even the rocket launcher or sniper rifle. You can sneak into position, or stay in a really open place where no one usually travels and still be safe. Camo can be used to distract a whole team when attacking or defending. One player pops their camouflage and the other team will lose their radar to the jamming effect, thus disrupting their flow and co-ordination.


    HOLOGRAM


    Hologram projects an image of your character when activated. The hologram moves across the terrain to wherever you have pointed your reticle. Holograms serve to confuse your enemy into wasting shots, or distracting them while running away or towards them.


    Things to know about hologram. Only one hologram can be activated at a time. The ability recharges quite quickly. If a hologram has not disappeared before a new one is deployed, then the old one will vanish when the new one is activated.

    Hologram is mostly used in team sniper games. Hologram is the bane of snipers because not only does a shot become wasted, but your position is revealed as well. A trick that many use when closing in on someone is to send a hologram right at them, this can confuse their aim if done correctly, as both the hologram and the players tend to merge in and out of each other.

    So that's all for now on armour abilities. I hope you have a good idea of how they work now and how you can use them to good effect in your online matchups.

    Wednesday 14 December 2011

    Armour Abilities: How They Work - Part 2

    As everybody knows by now, when Halo Reach hit the shelves back in Sept 2010, and having sampled the beta myself in May 2010, the newly included armour abilities were introduced into the game.

    The idea behind armour abilities is to give a player a certain advantage in battle. And to fit in with the story of Halo Reach, the planet Reach was primarily a military fortress world where new technology was being developed. Hence we get these armour abilities. From the next game in the series point of view the armour abilities are a more refined version of the deployable, and 1-time use, equipment from Halo 3.

    Now, there are several armour abilities you get to choose from when you begin a match in Halo Reach. These armour abilities are preset by the gametype and match you are playing.

    The armour abilities include:

    • Sprint
    • Evade (elites)
    • Armour Lock
    • Jet Pack
    • Medic (drop shield)
    • Camouflage
    • Hologram

      We'll take each armour ability at a time, describing how it works dynamically, and then a brief note on how to use it to full effect.

      Note: all armour abilities have a cool down time once used, which replenishes automatically, some take longer than others. And you get the choice to switch which ability you want to use each time you respawn. So you can keep changing them each time if you want.

      Copy and paste over. In part two of this article we will look at another two of the Armour Abilities. We'll talk abut Jet Pack and Drop Shield.

      JET PACK


      As you would expect jet pack allows you the ability to fly around for short periods of time. When activated the JetPack will send you upwards a certain height as long as the button is pressed. To cover a gap or distance over the ground you can pulse the trigger for short burst to cover a long distance.


      Things to know about JetPack. You can fire your weapon whilst flying. If you fall from the air you will still take fall damage. When falling if you activate a short burst of your JetPack you will soften the fall and can avoid sustaining heavy amounts of fall damage. JetPack recharges fairly quickly when not in use. JetPack can be used to hop up several levels in a short space of time than if you were manually running on foot.

      JetPack works very effectively if you have a rocket launcher. The added height advantage affords you air to ground shots, with a much reduced chance of blow back on your character. Caution is required for JetPack-ers as flying around all the time with no cover makes you an easy target. Also a neat trick is to jump before activating your JetPack for a better climb in the air.


      DROP SHIELD


      When deployed the drop shield creates a bubble, sphere, of protection from damage. It also heals the health, not shields, of any player inside it. This bubble can only sustain so much damage before expiring.

      Things to know about Drop Shield. When activated your ability meter will drain entirely, giving you only 1 bubble shield per shot. However if you press the button accidentally and the character does not compete the animation, you will not drop a shield and the meter will remain full.

      Drop shield is great for blocking in door ways, and then protect them with melee weapons. Or just for a quick heal. Also the protection offered in objective based games proves a very powerful armour ability to have.


      In part three the last two armour abilities will be discussed.


      Tuesday 13 December 2011

      Armour Abilities: How They Work - Part 1

      As everybody knows by now, when Halo Reach hit the shelves back in Sept 2010, and having sampled the beta myself in May 2010, the newly included armour abilities were introduced into the game.

      The idea behind armour abilities is to give a player a certain advantage in battle. And to fit in with the story of Halo Reach, the planet Reach was primarily a military fortress world where new technology was being developed. Hence we get these armour abilities. From the next game in the series point of view the armour abilities are a more refined version of the deployable, and 1-time use, equipment from Halo 3.

      Now, there are several armour abilities you get to choose from when you begin a match in Halo Reach. These armour abilities are preset by the gametype and match you are playing.

      The armour abilities include:

      • Sprint
      • Evade (elites)
      • Armour Lock
      • Jet Pack
      • Medic (drop shield)
      • Camouflage
      • Hologram

        We'll take each armour ability at a time, describing how it works dynamically, and then a brief note on how to use it to full effect.

        Note: all armour abilities have a cool down time once used, which replenishes automatically, some take longer than others. And you get the choice to switch which ability you want to use each time you respawn. So you can keep changing them each time if you want.


        SPRINT

        Sprint is well sprinting. This is much faster than the ordinary run speed. You can not fire when you sprint, but can fire very quickly after you stop.

        Things to note about sprint. If you jump when sprinting you will leap much further than normal. This is handy for jumping big gaps, evading an enemy or fleeing a vehicle. A deadly combination of sprinting is using a melee weapon like the sword or gravity hammer. You sprint up to an opponent and kill them in on hit with the sword or hammer.


        Tip: Press the sprint button again to stop the sprinting before the meter runs out. The recharge time is fractionally less than if you were to let the meter run down entirely.


        EVADE

        Evade is commonly used by elites. It is an ability that allows the player to perform a rolling manoeuvre in whichever direction the character is running. A player can evade 2 times in quick succession before the meter runs out. After which the ability recharges.

        Things to note about evade. Whilst evading you can not fire. A good way to use evade is to use one evade to move around and attack, and then use another evade to take cover again. Also, try rolling behind an enemy so they can't shoot you. You can also use two evades to close in on an opponent quickly if they are far away, then melee them with the sword. 


        Tip: If you jump immediately after evading, the jump will be slightly more pronounced in distance leapt than a regular jump. However this was toned down slightly from the beta.


        ARMOUR LOCK

        Armour lock is a protective ability which makes you immune to damage. Yes you become invincible. The ability remains on only as longs as you hold down the trigger. Your character goes into a crouch position, unable to move. However you can still revolve the camera around to see any enemies. And once you release the trigger the ability releases a small emp shock that reduces nearby enemy shields. 

        The intended use for armour lock is versus a vehicle. Say a ghost or warthog that wants to splatter (crush) you. Armour lock can destroy a vehicle that hits you directly when activated. 

        Things to know about armour lock. Armour lock can be activated twice in succession, or continually for several seconds. 


        Tip: If you are nearby an enemy armour lock and release, then beat them down with a melee. The emp effect reduces their shields and you get a free kill. If an enemy armour locks, run up to him and use your armour lock. Simply wait and release after he comes out. Other tactics include locking, thus avoiding damage, releasing and throwing a grenade, then armour locking again to stay alive.


        The other four armour abilities will be discussed in part 2.
        Saturday 10 December 2011

        Part 3 - Advanced Online Multiplayer Tactics: Giving You The Advantage

        Halo Psychology- 101 

        All players will do these things when the game begins:
        • Run for a DMR. (a good habit, I'm not slating this one)
        • Rush for the Power Weapons (Rocket, Sword, Shotgun, Sniper rifle) (again a good habit, but if done incorrectly, ie: without support, can lose you control of the weapon and start the game off badly)
        • Rush for the nearest Vehicle (usually a Banshee or Tank, or worse a mongoose or warthog [alone in a warthog lol!]) 
        • Run headlong into the middle and engage the first opponent(s). 
        This comes from several years of online experience observing, not just the enemy but also your own team mates, and my own movements. These things aren't bad in themselves. You always need to get better weapons. But rushing in all the time will only work for so long. Once you face a team of well drilled opponents you will be dead before you can call for help or retreat.

        The first two points in the above list are good things to do. Especially if you use your map knowledge. When it comes to playing as a team, it is better that all of you have a DMR as your primary weapon. As a team of DMR users will most likely always win vs a team using pistols and assault rifles. 

        Some players may squabble if there are not enough DMR nearby. Avoid getting upset or team killing if you don't grab a DMR. It's not the end of the world, just use your map knowledge and head for a different one. 

        When it comes to attaining a power weapon , like the rockets, you will stand a good chance of claiming it, or taking it off a player who has rushed to get it, if you have a DMR than if you purely rush in with your assault rifle. This is a judgement call you have to make each game at the outset. If you get it wrong and die, and gift the power weapon the the other team, you are in a bad position and generally will lose a few (team) kills because of that.

        Rushing for a vehicle depends on the game type and map. If it's an objective game then it is helpful to have a warthog circling around and picking up and dropping off players. However if you rush in a vehicle alone and then try and take on the other team alone you will invariably lose each time.

        The last point about darting into the 'middle' or straight towards the opposing team is something that should be avoided. To do this try and plan your movements so that you can circle around or perhaps pick off individual/alone players. Use of your map knowledge and radar is key when moving around the map towards the opposing team.


        All players will do these things when they spot you:
        • Fire- Even if they have an assault rife vs your DMR and are miles away. 
        • Charge you down. Opponents will always run towards you no matter what. (generally bad but particularly hilarious if they don't spot you have a sword or shotgun, happens so many times)
        • Panic when their shields are down and try to hide behind something and stop attacking. (of course by this time its too late to think about that)
        • Hurl grenades if they see you have a superior weapon to them, forcing you to evade. (I love grenades and they can be used correctly)
        Recognising a Good/Bad player:

        These general rules apply to team mates and to the opposing players as well. After playing for a minute or two into a match you should have an idea of how good everyone is playing. You can tell how good or bad a player is by:
        • Their movement around the map, do they know where the weapons are? and do they use them effectively? do they support you and stay together, or not?
        • Does this person have murderous accuracy or aim to get headshots?
        • Do they pay attention to the radar, or do you have to tell them an enemy is coming from behind?
        • Do they just pick up any weapon because it is there? needler (less favoured in online matchups) Or do they just bomb around with only their assault rifle?
        • Do they communicate what they want to do and where the enemy are coming from, or not
        • Have they got lots of kills like 4 or 5 in the first minute? or after a couple of minutes do they still have 0?
        As you can see it is not hard to tell who the good and bad players are even in the opening minutes of a match.

        Weapon Feinting:

        This is the practice of firing/ using a weak weapon like the assault rifle to draw a target towards you, making him think he has the upper hand. Then (usually after rounding a corner) switching weapons to a sword or rocket launcher.

        Many people still don't look at their opponent to see what secondary weapon they have. That big tube thing that sticks up in the air is the rocket launcher.

        If your feint fails you can get into trouble. If you fire your shotgun prematurely, a sensible player will back off, throw grenades and always keep enough distance away from you so you can't one shot him. 

        If used correctly you can bluff being weak, then pop out the big guns and take the opponent off guard. Also try feinting with crouching around a corner for an even deadlier mix.

        Friday 9 December 2011

        Part 2 - Advanced Online Multiplayer Tactics: Giving You The Advantage

        Scoring, A Simple Numbers Game, That Many Don't Get

        I remember reading about this in a Halo 2 strategy guide way back in 2004/5 and it was one of two strategy guides I bought for the game. The guide focused primarily on online multiplayer, detailing all the release maps and vehicles and weapon locations etc... but the logic and strategy and psychology that the guide taught me is equally as valid now.

        One thing it taught me was how to monitor your team score and how your kills and deaths affected that score. It also showed how you can make a difference by paying more attention your team mates as well as the score board to improve and win more of your games.

        Let's take a look at what I'm talking about.

        In a standard 4v4 team slayer you have 50 kills to score. You have got to achieve those 50 kills before your team gives away 50 kills (deaths). Check. So this means each time you die you give away 1 point. Obviously.

        So then you should be in the mind set of scoring 1 kill each time you die or better. Obviously you win if you do better and score a kill without dying or if you score at a ratio of 2 kills (or more) to one death. This means that on each spawn cycle you are scoring more than your opponents are. Which is better than both getting to 49-49 and it being a lucky last kill victory.

        So how do you achieve this?

        A large part involves
        • staying together as a team
        • controlling the power weapons 
        • avoiding giving away your position, but ultimately 
        • paying attention to how the game and score progresses.

        Yes, you have to pay attention to the score throughout the game. You and your team need to get a feel for how the game is going, and make adjustments to the way you play.

        If your scores are tied, then both teams are scoring evenly. Going back to the ratio analogy from earlier, you are getting 1 kill to 1 death. Which means you need to tighten things up. You need to pay attention to the weapons, enemy movement, their tactics and your teams overall effectiveness to the the advantage. 

        How? COMMUNICATION!  (the second biggest point/problem in online gaming in that 2004 strategy guide I mentioned earlier on)


        use your microphone and remind your allies to stop running at the enemy. Tell your team mates where the enemy are, what weapons they have etc... but speak calmly to your team and use their names to make things clear. People respond to calmness and respect better than hate, an upset tone or sarcasm.

        Personally you will get a feel for how much you or a certain team mate is dying. Or you may notice that in the first few minutes a team mate already has 10-15 kills. It comes with practice. Commend good players, help weaker players.

        When you do this you begin to score without giving away as many kills to the oppsition. You start drifting toward the 2 kills to 1 death ratio. And your team confidence will take a boost. You all realise that you can win if you work together better.

        The next part in the series will look at player psychology and weapon feinting.


        Thursday 8 December 2011

        Halo 4 Related Info and Videos

        Now I know this has broken away from the Halo Reach advance tips sections that is on going. But I want to make this place also about all kinds of Halo related things. So, seeing as Halo 4 is due out near the end of next year I want to keep you up to date with the latest info and hot details that Halo 4 will offer you.

        These videos are some of the coolest info about Halo 4. And if you haven't seem them yet there always worth a look:

        [Be warned spoilers for previous titles follow this video, read at own discretion]

        This first one is the E3 Teaser Trailer from 2011:


        So in this video we see the Chief being re-awakened from his cryo sleep chamber after the events of Halo 3, where the Chief and Cortana are stranded  after the ark explosion at the end of the game, in what was left of their derelict ship.

        Supposedly the game will pick up what happens next, and may even introduce to the gamer the forerunners themselves, who have been alluded to throughout the series. The forerunners of course are the ancient and intelligent race that built the Halo array, the ark and other technology in the halo universe.

        It will be interesting to see if they will be unveiled within the game directly. But we will have to wait and see about that.

        Check back tomorrow for the next video.

        Wednesday 7 December 2011

        Part 1 - Advanced Online Multiplayer Tactics: Giving You The Advantage

        Here is a quick list of the topics we will go through together to help you improve your halo gameplay to match and beat other people in Halo's online multiplayer.

        These tactics should become an integral part to your playing style to make the best improvements in your gameplay. In part one of this series we will look at Crouching, and Hiding from view and Weapon respawn times.

        The rest of the points this series will look into are:
        • Crouching/ hiding
        • Vehicle and weapon respawn timings.
        • Denying Power Weapon control.
        • Score Tracking and How You Affect Scoring.
        • Player psychology, the enemy and you. When to engage, how to pick targets, what to do, spotting a good player vs a bad one.
        • Weapon Feinting.

        PART 1  -   Crouching and Hiding


        A small part of Halo that so many still do not utilize, is crouching. Why is this? Psychologically many just want to rush into battle and don't even consider crouching to be a relevant part of the game.

        Crouching makes you invisible to radar! Everybody who looks at their radar is blind to your exact location when you crouch. Adversely if you crouch too much you won't get into any battles, and will lose your team the game because you are reducing the overall team effectiveness.

        There are appropriate times to consider crouching. The first is to set up an ambush. This is best done in common walkways or specific rooms that get a lot of traffic. Ambushes focus on the use of a combination of crouching and perhaps using an armour ability and/or a power weapon. The use of a shotgun, sword, rocket, or an assassination move are the best options when constructing an ambush.

        When is the best time to start crouching in general? There are at least four occasions: 
        • when you are out of an opponents visual or radar range, allowing you to 'creep' into position. 
        • when a frantic battle takes place and there is a lot of radar activity.
        • when being pursued by an opponent, crouch after rounding a corner, and switching to a sword or shotgun.
        • When shooting with a DMR, crouching slightly improves long range accuracy, by reducing the bloom.
          The objective of crouching is to confuse an opponent, or to remain hidden from them entirely. Because when people don't see you, you have the advantage!

          Vehicle And Weapon Respawn Timing

          I'm not sure of the exact figures for each specific weapon and vehicle respawns on all of the maps, you'll have to search for that yourselves. However the exact timing can be deduce by learning it in game and by regularly checking for a specific power weapon, during the course of a match. Power weapons like the Rockets spawn around every 3 minutes, so that there are 4 respawns during a 12 minute match.

          This is another important aspect of the game to master, as basic control over the weapons begins with knowing when they appear and basing your movements around that. It's not so much about being able to know the exact time as it is about getting the feel for when a weapon appears, and checking once or twice if you're not sure.

          And it's the same with vehicles, they all have their set amount of time before they respawn. Don't be hovering around a vehicle spawn for minutes on end, as this only sacrifices your team's overall effectiveness/synergy. A good example is the falcon on spire, lots of people want to get it and trek all the way there, then lingering around for minutes on end. This is a waste of time and team effectiveness.

          Of course knowing exactly where all the weapons are is a basic map knowledge that you build up over time. There are many MLG articles about the exact timings and weapon maps (see below) to save you going through each map yourself to learn where a certain weapon comes from.


          Most weapon maps look like this. But its a good idea to try going into the map and having a quick run around just to get the feel of where some of the key weapons are, and how long it takes to spawn after using them etc...

          Part 2 - we will be looking at two more aspects that are considered advanced for Halo Reach, these are: denying power weapon control, and how you affect the scoring of a match.

          Tuesday 6 December 2011

          Next Mini Series - Advanced Tips For Online Multiplayer

          So I hope you enjoyed the first mini-series of basic tips. And in the next few days I will release the next series of more advanced tips to keep you up to speed with the more skilled online halo gamers out there.

          Part 1 of the advanced tips will be about two aspects of your halo experience. Crouching and hiding. And vehicle and weapon spawning.

          It is my aim in the advanced section to improve the way you look at the game while your playing it, so as to get a clearer view of the whole scope of functions and actions that you can utilize to improve your game. Plus it's also from my perspective:  someone who has played perhaps a little too much halo over the years.

          So I hope you find this next mini series informative and exciting as you learn some neat tips. Ones that I've learned and have been using, that gives you a nice edge in online matchmaking.. Part 1 is coming soon!

          Monday 5 December 2011

          Part 3 - Basics to Online Multiplayer, Getting the Best Out of You


          Part 3 - Avoiding Mistakes and Focusing.

           Here are some mistakes you want to avoid, these include:
          • Mis-throwing a grenade that backfires on you, hurts/kills a team mate or flips a friendly vehicle.
          • Rushing into battle constantly with only an assault rifle and grenades. (seen it thousands and thousands of times) Unless you're very experienced and have deduced that the enemy is not good enough to beat you. 
          • Rocket killing your own team mates. Which is even easier that grenade killing them.
          • Carrying 2 power weapons at a time. Rockets and Shotgun. Sniper and Rockets. Are bad combos for one player, it's generally much better to assign a team mate the other power weapon and have a DMR or Pistol in reserve.
          • Rushing into battles, and giving away your position. (again see I this thousands of times)
          • Running out in the open with short range power weapons.
          • Staying indoors with long range power weapons like the sniper rifle.

          That point about rushing into battles ties in with being focused, because most times it's your attitude that makes you rush in and dying ( which just feeds the enemy kills until they get a free win.) You just get frustrated and try the same thing over and over again. Use your map knowledge, learn where the right weapons are that you need.

          Being Focused.

          This is something you need to get in the habit of doing. And it's best described as being in the zone. Sounds a little cliched, but it's almost like you have to be sensitive to everything going on in the game. The movement of your team and the opposing team, the power weapons, who controls them, what the current score is, who the good and bad players are.

          The more you stay focused on these things and especially on achieving your short term and overall game goals, the better you will do. This means having as few out of game distractions, like eating, drinking, talking etc... this of course is different for everybody, but do what's best for you.

          Another thing is to try and stay loose. An overly tense player can't fully focus on playing as they are too tense. And this can change throughout the course of a game. Try to relax and focus on playing your game.

          Sunday 4 December 2011

          Part 2 - Basics to Online Multiplayer, Getting the Best Out of You

          Watching Your Team Mates and Observing The Opposition.

          3) Watching where your team mates are going is another crucial aspect to consider. As there is little point in 3 or more team members running for the same power weapon or vehicle that ultimately only one player can utilize. But having 2 of you secure a power weapon is always a good solid tactic, and the preferred method.

          The N00b tube, or Spankr as some call it.


          Also it's a good idea to look out for team members who tend to play alone, help them out where possible without sacrificing your position or game plan. Or if you team member is sniping, give them cover, maybe with a shotgun, so they are able to focus on their task.

          So deadly in close quarters.

          4) Observing the minimap, and viewing (catching sight of) the enemy from afar is another key aspect that begins at your basic level. Try to judge which way the enemy are headed, and why. Are they securing a power weapon? are they controlling the higher ground, or a certain vehicle?  or holding up in a certain room or area?

          Once an enemy spot appears on your radar you should have a very good idea of where he is. You should also be able to deduce from his movement, or lack of, things like: has he noticed you on the radar too, what is his objective (is he running for a power weapon or just hovering around a room or stopped there waiting to ambush you or your team.)

          If you are out numbered, there is always the choice to retreat, don't always jump straight in, it rarely ever works. Unless, of course, you are confident in using a weapon like the Rocket Launcher to soften the enemy up.

          The radar can only show you players that are close by. For larger maps, you will need to develop a keen eye so that when you spot an enemy you can gather an idea of his weapons, location and movement in a split second. Even from across the map on say team sniper matches. The moment you start not paying attention is where the match slips away.

          Can you see how paying attention to your team and the enemy is key to a playing the right sort of game. At all times you should have a rough idea of where everyone is. What weapons are in control, and who is controlling them. Where an objective is (if doing objective based games).

          Try to be aware of as much as possible at all times.

          Saturday 3 December 2011

          Part 1 - Basics to Online Multiplayer, Getting the Best Out of You

          This blog is primarily about Halo:Reach, but can be translated to Halo: Combat Evolved Anniversary multiplayer as well. The basics of playing human opponents, revolves around a few key things from the outset of a match. So let's get straight to it.

           Key points are as follows:
          • Choosing the right weapon and armour ability.
          • Choosing a strategy like for example, go for weapon X  to achieve an objective Y.
          • Watching where your team mates are going and what they are doing.
          • Observing the opposition to determine their plans.
          • Reducing/Avoiding doing silly mistakes.
          • Having the right frame of mind to play: being focused.

          Choosing the right weapons and armour ability. Choosing a strategy.


          1) Choosing the right weapon varies slightly with each match up based. But 9 time out of 10 when the game starts, your best choice is to pick up a rifle.


          The DMR, Designated Marksman Rifle (above picture) fits the bill perfectly. In fact, it is your best friend, as it can quickly strip an opponent of shields and take them out with a head shot once they are unshielded. Favour getting the DMR first, where possible.

          Once you have a rifle, next you will want to head for a power weapon. This is because most games can be won based on who controls the power weapons. Power weapons are one hit kill weapons like the shotgun, sniper rifle, sword, fuel rod gun and rocket launcher. Which one you choose depends on the map and your style.

          Personally I go for the Rocket Launcher. As with all weapons, practice, practice, practice! Try to become comfortable with your weaponry. The DMR is a clinical tool. Hammer away at the trigger for close range targets, whilst pacing your shots more on medium range.

          1.5) Choosing the "right" armour ability can be very circumstantial. It is also a matter of choice. Choose Sprint to get to the power weapons quickly. The other armour abilities, for the moment, can be considered after the game changes, ie: once you respawn and need something like armour lock to block the rockets the enemy now has.

          Team tactics using abilities like armour lock to draw fire and camouflage to blind enemy radars will be discussed some other time.

            2) This is the part where your weapon choice now affects the game play. With a DMR you can put pressure across short, medium and long distances. DMR beats the assault rifle, especially while still in the opening 10-20 seconds of the match. And with that DMR you should be heading to your first power weapon. Possibly the sniper or rocket, as these usually have to be fought over to obtain.

            In some cases you may favour getting a better position (possibly higher or further away) instead of going for the power weapon(s). A good example is the rockets on Powerhouse in the spillway, as Red Team spawns on top.


            You goal in most games should revolve around keeping possession of power weapons, and keeping them in the best area where they can be utilized to the full.
            It's no good having a Shotgun roaming around outside a base against a team of DMR and Snipers. And it's no good keeping a Spartan Laser in doors.


            Coming Up In Part 2: Watching Your Team Mates and Observing The Opposition.