The Banshee was given it's name by the shrill shrieking noise it makes during flight. So when you hear it coming you need to deal with it fast. The reason why a Banshee is such a potent killing machine is because the gunner and the pilot are one. The pilot is always pointing at where he intends to shoot. Add to that the very agile nature of the craft, it being relatively small and able to perform flips, makes this vehicle a very evasive and effective killing machine.
A banshee needs to watch out for other aircraft and in particular scorpion tanks, which could blow them up in one direct hit.
Being agile mean that the Banshee is fairly weak, only able to withstand so much small arms fire. High velocity bullets like sniper rifles will rip the craft apart in a few shots.
When piloting a Banshee your key objective is to stay on the move and avoid lots of attention. Not easy when you are flying high in the air with no cover, right? The Banshee's greatest strength is it's ability to quickly kill enemies using the fuel rod gun (secondary fire weapon). Infantry, and light vehicles get one-shotted with ease.
Try to focus your fire on infantry, who make easy prey. However if an enemy is virtually underneath the Banshee don't circle around to the ground in an attempt to desperately get a difficult kill as this will make you an easier target for grenade sticks, plasma pistol and grenade EMP effects and sky-jacking attempts. Instead break off and find a new target.
Spotting infantry is easy from your vantage point in the sky. You need to get a feel for how to set up for an attack. To set up effectively you need to bear in mind where your target is, could he run for cover? does he have teammate support who may attack you? are there any enemy vehicles nearby? If using the fuel rod gun, ensure you get within range to allow for travel time of the projectile to hit the target accurately.
The same applies for attacking ground vehicles. The only big difference is when taking on an enemy tank. Depending on it's strength the tank will require two shots from the fuel rod gun to destroy it. From the front tanks have stronger armour. Try to get behind the tank and attack from the rear, this will prove deadly to them, and will ensure that you don't get fired upon, putting you under less pressure at least initially.
When attacking another Banshee you need to be aware of a few things. An important point is to keep at a range that allows you to fire with the standard canons, but allowing you some time to evade (roll or somersault) to avoid a fuel rod gun shot. You can also use somersaults to get above and behind an enemy to get the advantage over them. Another good tactic is to bring the battle down to the ground, luring an enemy Banshee nearer your allies who can then fire or sky-jack the enemy vehicle and claiming it for your team.
Notice in this video that the Banshee pilot always keeps moving, performing somersaults and boosting around. This makes him virtually unable to be hit or attacked, which is exactly what a Banshee pilot should be doing.
One thing not to forget is that all covenant vehicles possess a boost ability that allows for quick movement, but at the cost of being unable to fire whilst boosting. A Banshee can use this ability to snap around the map very quickly and instantly rain death on unsuspecting victims, in a lot of cases for the entire length of a match.
A Banshee can control the map, control the players on both teams and can ultimately decide the game, if used effectively!
Try to take out a Banshee wherever possible, as you will find it much easier when one is not threatening you and your team throughout the course of a match.
Showing posts with label vehicle basics. Show all posts
Showing posts with label vehicle basics. Show all posts
Monday, 20 February 2012

Thursday, 16 February 2012
How to Use It Effectively - The Wraith
The Wraith is the Covenant's battle tank. It is bulky, slow, but very powerful and like the Scorpion it has two seats, one for the driver and one for a secondary gunner. The Wraith fires a massive plasma bomb that is heavy and deadly. Because of this it travels in an arcing trajectory, which allows the Wraith to hit targets over hills and behind obstacles.
Just like the Scorpion, the biggest threats to a Wraith include hi-jackers, other tanks and aerial attackers. However the wraith does have a limited boost function, which can be used to escape a jack attempt or to attempt a splatter on an infantry opponent who rushes you.
Try to avoid tight and enclosed spaces, and always have supporting infantry nearby to protect you from jacking opponents.
Advanced tactics of the Wraith include firing across long distances to a known enemy location, whilst you are under no immediate threat. The main canon never overheats, so you can fire it all day long. This tactic will only work for a limited time as people will catch on. But this can still allow you to catch a few players off guard grabbing some kills.
When going up against another tank try to position yourself near cover so you can fire at your target, cover while the main canon reloads, then come out of cover and resume firing. Sometimes the fight may be up close and personal with another tank, avoid hitting at point blank range as this will cause you to take damage from your own shots. Make good use of the boost function to evade shots. This requires good timing.
When attacked by an aerial opponent you have two choices:
1) fire back and attempt to hit them, or
2) bail out and take cover.
Trying to hit a distant aerial target is virtually impossible for any player, unless the target happens to stray too close or if he's clearly not paying attention to you. If you get caught out you can always bail out of the tank if needed, just remember that it takes a couple of seconds to get clear. Sometimes even if you think you have cleared the tank, it can explode and still kill you.
Just like the Scorpion, the biggest threats to a Wraith include hi-jackers, other tanks and aerial attackers. However the wraith does have a limited boost function, which can be used to escape a jack attempt or to attempt a splatter on an infantry opponent who rushes you.
Try to avoid tight and enclosed spaces, and always have supporting infantry nearby to protect you from jacking opponents.
Advanced tactics of the Wraith include firing across long distances to a known enemy location, whilst you are under no immediate threat. The main canon never overheats, so you can fire it all day long. This tactic will only work for a limited time as people will catch on. But this can still allow you to catch a few players off guard grabbing some kills.
When going up against another tank try to position yourself near cover so you can fire at your target, cover while the main canon reloads, then come out of cover and resume firing. Sometimes the fight may be up close and personal with another tank, avoid hitting at point blank range as this will cause you to take damage from your own shots. Make good use of the boost function to evade shots. This requires good timing.
When attacked by an aerial opponent you have two choices:
1) fire back and attempt to hit them, or
2) bail out and take cover.
Trying to hit a distant aerial target is virtually impossible for any player, unless the target happens to stray too close or if he's clearly not paying attention to you. If you get caught out you can always bail out of the tank if needed, just remember that it takes a couple of seconds to get clear. Sometimes even if you think you have cleared the tank, it can explode and still kill you.
The Wraith driver in this video keeps to his team's side of the map, staying near his allies for support. He engages in tank vs tank combat and executes a well timed dodge with the boost function, avoiding destruction.
One thing in particular you will notice is he always keeps moving. This is important because once you slow down in the Wraith you become a slow target and a big opportunity for hi-jackers and other vehicles. Note that it is necessary to lead you target quite a lot due to the slow speed of the plasma bombs.
When threatened by a hi-jacker from directly infront, consider boosting into them to get a splatter, neutralising the threat.
Practice with the Wraith to get used to the arcing trajectory of the main canon. You can fire over the entire length of a map and steal some quick kills, but your primary objective is to get used to hitting targets at medium range who are in direct (or indirect) line of sight.
Have fun.
Tuesday, 7 February 2012
How to Use It Effectively - The Revenant
Quite simply the Revenant is the illegitimate love child of the ghost and wraith tank. It has similar style to the ghost, being able to hop around fairly quickly, whilst having, effectively, a large version of the concussion rifle as it's primary weapon that arcs similar to the Wraith tank.
As such, the same strategy as the ghost applies when using the Revenant: circle infantry opponents and attack from range. However because each shot arcs and is more powerful (shot per shot) than a ghost plasma shot, the Revenant is capable of engaging other vehicles like Ghosts and Warthogs much more freely. The explosive nature of the main canon can flip vehicles, which is particularly handy to wipe out a Warthog full of opponents.
Revenants are still inferior when fighting tanks. Avoid going toe to toe with a tank, rather focus on keeping out of their way and pay attention to Warthogs, other Revenants, Ghosts and of course infantry.
In this video the revenant does get used, and when it does you will see that it acts just like a ghost. Generally you will find Revenants in larger battles involving objective based games. Always keep on the move, as mobility is always important.
Just practice with the Revenant and get a feel for what it's good and and what it's not so good at. Try to lead targets when shooting at long range. And if you feel like a battle is too overwhelming keep you distance and wait for team support.
As such, the same strategy as the ghost applies when using the Revenant: circle infantry opponents and attack from range. However because each shot arcs and is more powerful (shot per shot) than a ghost plasma shot, the Revenant is capable of engaging other vehicles like Ghosts and Warthogs much more freely. The explosive nature of the main canon can flip vehicles, which is particularly handy to wipe out a Warthog full of opponents.
Revenants are still inferior when fighting tanks. Avoid going toe to toe with a tank, rather focus on keeping out of their way and pay attention to Warthogs, other Revenants, Ghosts and of course infantry.
In this video the revenant does get used, and when it does you will see that it acts just like a ghost. Generally you will find Revenants in larger battles involving objective based games. Always keep on the move, as mobility is always important.
Just practice with the Revenant and get a feel for what it's good and and what it's not so good at. Try to lead targets when shooting at long range. And if you feel like a battle is too overwhelming keep you distance and wait for team support.
Monday, 6 February 2012
How to Use It Effectively - The Ghost
The ghost is designed for quick travel and great agility. Whilst being effective against single and multiple infantry opponents, it is not advisable to engage other vehicles, especially tanks or aerial vehicles. The ghost is an infantry superiority vehicle.
A common feature of ghost users is to engage the boost action to mow down unsuspecting victims for an instant splatter kill, however you need to be aware of armour lock users, as hitting a locked infantry at full speed will result in you being destroyed.
The ghost's primary plasma canons are fast firing and never overheat. The ghost naturally provides the driver with cover from the front, but tends to be exposed from the back and sides. Always try to face your opponent to reduce damage to your person.
If you are taking too much fire, rush away with the boost function. Note that the ghost is somewhat fragile and can be flipped easily or blown up by grenades. When deciding to use a ghost, if the vehicle looks wrecked avoid using it altogether.
When using the ghost attacking a single infantry opponent strafe around the target in circles or at a distance away from grenades to bombard him with continuous plasma fire. If he does not have armour lock consider the possibility of a splatter.
When engaging two or more opponents at once, who are not aware of you, consider going for a splatter. However if they are aware of your presence, the safer option may be to fire from range to weaken them.
Never be ashamed to run away if you are outmatched. When engaging any opponent(s) always be aware of obstacles or buildings to use for cover.
Good use of the ghost, shows that keeping on the move and being selective of when to splatter an opponent tends to work out better for the driver.
This second video shows that getting a bit too greedy and moving slowly in a more enclosed space allows opponents to hi-jack the ghost.
A common feature of ghost users is to engage the boost action to mow down unsuspecting victims for an instant splatter kill, however you need to be aware of armour lock users, as hitting a locked infantry at full speed will result in you being destroyed.
The ghost's primary plasma canons are fast firing and never overheat. The ghost naturally provides the driver with cover from the front, but tends to be exposed from the back and sides. Always try to face your opponent to reduce damage to your person.
If you are taking too much fire, rush away with the boost function. Note that the ghost is somewhat fragile and can be flipped easily or blown up by grenades. When deciding to use a ghost, if the vehicle looks wrecked avoid using it altogether.
When using the ghost attacking a single infantry opponent strafe around the target in circles or at a distance away from grenades to bombard him with continuous plasma fire. If he does not have armour lock consider the possibility of a splatter.
When engaging two or more opponents at once, who are not aware of you, consider going for a splatter. However if they are aware of your presence, the safer option may be to fire from range to weaken them.
Never be ashamed to run away if you are outmatched. When engaging any opponent(s) always be aware of obstacles or buildings to use for cover.
Good use of the ghost, shows that keeping on the move and being selective of when to splatter an opponent tends to work out better for the driver.
This second video shows that getting a bit too greedy and moving slowly in a more enclosed space allows opponents to hi-jack the ghost.
Thursday, 2 February 2012
How to Use It Effectively - The Scorpion Tank
Here is an 8 minute video of the scorpion in action on Hemorrage, however note that the latest updates have changed this to the wraith now.
The Scorpion tank is the most effective vehicle you can use in Halo Reach. Because of the destructive force and direct shot of the main canon a driver can easily kill and infantry and vehicle targets usually in one shot, with the exception of other tanks.
However one particular weakness with the scorpion is the ease with which the vehicle can be hi-jacked, particularly from players using sprint or evade. Because of this a driver will need to be aware of approaching and rushing infantry.
Another issue with the scorpion is space. The scorpion's footprint is huge (the largest in the game). Because of this huge footprint the scorpion easily gets affected by changing terrain or caught up in smaller obstacles. Terrain will affect the angle of you shot, causing you to miss. And getting a tread caught in nearby obstacles can hold in place allowing nearby enemies to attempt a hi-jack.
Its always a good idea to have a secondary gunner around to provide extra defence against infantry attackers.
The main focus for a scorpion driver is to watch for enemy vehicles, in particular other tanks and enemy air vehicles (banshee or falcons), then to take care of infantry. The scorpion can run head on into battle to rack up several kills quickly.
Care needs to be taken when going tank vs tank. The best strategy to adopt is hiding the tank beding cover (like a hill or other obstacle) and poke the main gun over the top. Avoid missing shots as the reload time can mean the difference between staying alive or not. Other tanks generally take two shots to destroy, sometimes three. Beware that the canon can be destroyed by a good shot, rendering the tank unable to attack. If this happens just abandon the tank before it gets destroyed.
However one particular weakness with the scorpion is the ease with which the vehicle can be hi-jacked, particularly from players using sprint or evade. Because of this a driver will need to be aware of approaching and rushing infantry.
Another issue with the scorpion is space. The scorpion's footprint is huge (the largest in the game). Because of this huge footprint the scorpion easily gets affected by changing terrain or caught up in smaller obstacles. Terrain will affect the angle of you shot, causing you to miss. And getting a tread caught in nearby obstacles can hold in place allowing nearby enemies to attempt a hi-jack.
Its always a good idea to have a secondary gunner around to provide extra defence against infantry attackers.
The main focus for a scorpion driver is to watch for enemy vehicles, in particular other tanks and enemy air vehicles (banshee or falcons), then to take care of infantry. The scorpion can run head on into battle to rack up several kills quickly.
Care needs to be taken when going tank vs tank. The best strategy to adopt is hiding the tank beding cover (like a hill or other obstacle) and poke the main gun over the top. Avoid missing shots as the reload time can mean the difference between staying alive or not. Other tanks generally take two shots to destroy, sometimes three. Beware that the canon can be destroyed by a good shot, rendering the tank unable to attack. If this happens just abandon the tank before it gets destroyed.
How to Use It Effectively - The Falcon
The "Warthog of the skies" truly lives up to it's name. Instead of having one gun turret (like the warthog), this time you have two. Which means you need three players to use it fully. And if you have read the previous article about using the Warthog, then a lot of that ability translates into using the Falcon.
Instead of having one gunner with a 360˚ turn, you have two gunners which roughly have a 180˚ firing arc each, one for the left side and one for the right.
The driver needs to have the same awareness, being alert to possible dangers like in the warthog. Is there an enemy air threat approaching, a scorpion tank, or anti-armour infantry shooting you? The Falcon is capable of hovering in place, but it can move around fairly quickly too. The primary role of the Falcon is to support ground units, rather than take on fights against all odds.
Don't expect the falcon to smoothly dodge locked on rockets either. Like the warthog you are large (compared to a banshee) and far less agile to evade attacks. And if a scorpion tank spots you, opt for getting out of his sights as you will be shot down instantly.
Check out these videos:
This first one is from the gunners perspective and you can see how he only has a 180˚ field of fire but still manages to get a kill frenzy. You will also see that the falcon is effective at taking out enemy infantry and an enemy falcon too.
This second video show how well a good pilot and gunner combination works together along with map knowledge of weapons and spawn locations, resulting in dominating the other team and the gunner obtaining a rampage.
In both of these videos the pilot always keeps on the move, strafing ground units for the best effect.
Don't drive the falcon alone.
That was in a paragraph of its own because it is just a waste of vehicle power. Actually you should always look to get 2 gunners inside a falcon quickly, as one gunner can only shoot on one side of the aircraft. Sometimes a second gunner may not be spawned nearby, but make it your first priority to pick up a second gunner asap, as long as it is safe to do so.
Instead of having one gunner with a 360˚ turn, you have two gunners which roughly have a 180˚ firing arc each, one for the left side and one for the right.
The driver needs to have the same awareness, being alert to possible dangers like in the warthog. Is there an enemy air threat approaching, a scorpion tank, or anti-armour infantry shooting you? The Falcon is capable of hovering in place, but it can move around fairly quickly too. The primary role of the Falcon is to support ground units, rather than take on fights against all odds.
Don't expect the falcon to smoothly dodge locked on rockets either. Like the warthog you are large (compared to a banshee) and far less agile to evade attacks. And if a scorpion tank spots you, opt for getting out of his sights as you will be shot down instantly.
Check out these videos:
This first one is from the gunners perspective and you can see how he only has a 180˚ field of fire but still manages to get a kill frenzy. You will also see that the falcon is effective at taking out enemy infantry and an enemy falcon too.
This second video show how well a good pilot and gunner combination works together along with map knowledge of weapons and spawn locations, resulting in dominating the other team and the gunner obtaining a rampage.
In both of these videos the pilot always keeps on the move, strafing ground units for the best effect.
Don't drive the falcon alone.
That was in a paragraph of its own because it is just a waste of vehicle power. Actually you should always look to get 2 gunners inside a falcon quickly, as one gunner can only shoot on one side of the aircraft. Sometimes a second gunner may not be spawned nearby, but make it your first priority to pick up a second gunner asap, as long as it is safe to do so.
Wednesday, 25 January 2012
How to Use It Effectively - The Warthog
The first video shows you how a well co-ordinated team can score a flag capture very effectively.
The second video, although taken way back in the beta, shows how the warthog operates effectively against infantry, but can get destroyed quickly by a wraith tank.
The Warthog can be a potent weapon in the hands of a skilled solo player (or duo of players). On the other hand it can be a death trap for lonely and untrained drivers. We will briefly look at why this is the case and how you can learn to distinguish the right situation to use the warthog.
First things first, the warthog is a bulky jeep that swings around and draws lots of attention when sighted and by it's distinctive sound.
To use this vehicle effectively both the driver and gunner need to possess strong awareness skills, particularly so with the driver. The driver needs to be aware of armour lock users, the person carrying the rockets or other anti-vehicle weapons, if any tanks or banshees are on the battlefield, where his gunner needs to focus fire, objective carriers etc etc...
But the driver also needs to make life easy for his gunner. Only the gunner can attack, but he is much more exposed. Because of this the gunner and will be targeted first. A driver needs to help point the gunner toward his target(s), and to circle around them maintaining a good distance so as not to be under immediate threat.
At times the vehicle and/or players need to heal up, so retreating or fleeing can be the safer option. Along with evasive driving to avoid armour lockers, grenades and sharpshooters.
In battles which involve the warthog as the main fighting force versus infantry (foot soldier), the driver should focus on keeping at a sensible distance and always staying on the move. If you stay still for too long, grenades will hit, flip or destroy the warthog quickly.
In battles involving tanks, the best idea is to keep away from enemy tanks, and support your own tank guarding it from infantry attackers.
If negotiating with a banshee, drive directly underneath the craft to avoid it's shots. This enables the warthog gunner to attack the aircraft without recourse.
Avoid using the warthog on your own, and always try to team up with a player who communicates so you can coordinate your efforts when in combat.
Avoid using the warthog if the opposing team are capable of destroying any/all of your vehicles quickly, this may be because they have an excellent banshee or tank player, or someone who hordes the anti-vehicle weapons constantly throughout the match.
As a warthog gunner, try and focus shooting at short and mid range targets. And always take every opportunity to let the chain gun cool, rather than overheat. Because without being able to fire you could panic and die. Remember to prioritise your targets, if you run head-on into a battle and encounter another warthog, take them out first, mopping up the infantry later. If you have a tank shooting at you retreat and target other infantry instead.
Remember the warthog's primary role is to support a team, not be the focal point in a battle. Just because you are fairly quick does not mean you are indestructible. You are not a tank.
As with any vehicle, practice playing around with it on your own. Try to get a feel for how it handles, then try using it with a cooperative teammate. That's when there will be lots of fun to have using it!
How to Use It Effectively - The Mongoose
The first video demonstrate the ability to splatter opponents who don't watch their radars (of course good players would have killed the driver). At around 1.03 the mongoose driver does some evasive wobbling to avoid getting head-shotted by DMR fire, and he takes cover behind the base itself.
In this second video the mongoose driver assists the flag carrier to quickly return the flag. This is one great feature of the mongoose because it is a smaller target than all other vehicles and is the quickest too.
Effective Use
It's quite a short story when it comes to using the mongoose effectively. Most times you will utilise the mongoose to quickly collect power weapons or to transport an objective like the flag. Because of having no firepower and being exposed from every angle, if you get fired upon your best option is to flee behind cover, out of range or to bail out and start shooting back.
In rare cases you may be approaching an opponent and may be able to attempt a splatter. But this could prove dangerous as the mongoose tends flip over instead of killing your opponent. Think of the mongoose as a quick transportation tool only, and you can't go far wrong with it. The mongoose is a means to an end, the end being a quickly obtained power weapon, an advantageous position or a flag capture.
In this second video the mongoose driver assists the flag carrier to quickly return the flag. This is one great feature of the mongoose because it is a smaller target than all other vehicles and is the quickest too.
Effective Use
It's quite a short story when it comes to using the mongoose effectively. Most times you will utilise the mongoose to quickly collect power weapons or to transport an objective like the flag. Because of having no firepower and being exposed from every angle, if you get fired upon your best option is to flee behind cover, out of range or to bail out and start shooting back.
In rare cases you may be approaching an opponent and may be able to attempt a splatter. But this could prove dangerous as the mongoose tends flip over instead of killing your opponent. Think of the mongoose as a quick transportation tool only, and you can't go far wrong with it. The mongoose is a means to an end, the end being a quickly obtained power weapon, an advantageous position or a flag capture.
Monday, 16 January 2012
UNSC Vehicle Basics
Vehicles
Vehicles fall into a unique category within Halo Reach. Each class of vehicle has a certain role to play at a given time. Generally the classes are Transport, Support, and Primary Attacker vehicles. Beside each vehicle description will be the class it fits into and why.
Vehicles tend to draw a lot of attention when used over a longer time. As such, using vehicles too much will result in them being overcome by a determined team. Plasma pistol charge shots and the emp effect from grenade launchers can stall vehicles.
Human (UNSC) Vehicles
Mongoose
The mongoose is an ATV transport. It has no weapons built onto it. It can carry occupants to locations very quickly. The passenger can fire weapons while riding, but the driver can not. Both passengers are very exposed, hence they are easy to pick off with DMR and Sniper Rifle fire.

Role: Transport (only)
Driver: 1
Passenger: 1
Armaments: None
Durability/Strength: Weak
Weaknesses: Tend to roll easily. No protection for passengers.
This vehicle is for transportation only and has no offensive capability.
The most effective way to use this vehicle is to dash to where you need to go then get off as soon as possible to avoid taking damage. Especially if you are alone you will not be able to shoot back if you stay onboard.
Warthog laag
The Warthog is a supportive transport vehicle. The Light Anti Aircraft Gun (chaingun) Warthog version is intended for anti-infantry and anti-aircraft support. As with the mongoose the driver only drives. The primary gunner operates the main gun. And there is a passenger seat for a third occupant, who can fire as well. The Warthog provides a moderate amount of protection for driver and passenger, with the gunner being exposed.

Role: Support and Transport
Driver: 1
Passenger: 1
Gunner: 1
Armaments: None
Durability/Strength: Weak
Weaknesses: Tends to roll. Large target for Anti-Vehicle weaponry.
The Warthog laag is mainly a support vehicle.
As such the LAAG will overheat if fired too much, and require cooling.
Effective uses of the warthog include circling around the battlefield to catch unsuspecting enemies off guard, generally those who stay out in the open. In objective based games the warthog can be an effective drop-off and pick-up transport for a flag carrier. (although somewhat obvious target and slower than a mongoose)
Don't expect a warthog to last long when attacked by a Rocket Launcher, Plasma Launcher or Spartan Laser.
Rocket Warthog
The RocketHog has the same purpose as the standard warthog, but with much more powerful armaments. This version fires off a full volley of several rockets each time the trigger is pulled, so caution is required.
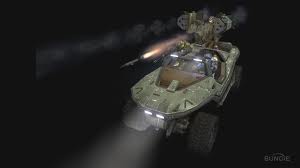
Role: Support, Transport and Attack
Driver: 1
Passenger: 1
Gunner: 1
Armaments: None
Durability/Strength: Moderate vs light arms
Weaknesses: Tends to roll. Large target for Anti-Vehicle weaponry.
You only see this warthog version in Firefight missions and Custom gametypes, not in standard matchmaking.
Effective uses of the warthog include circling around the battlefield to catch unsuspecting enemies off guard, generally those who stay out in the open. In objective based games the warthog can be an effective drop-off and pick-up transport for a flag carrier. (although somewhat obvious target and slower than a mongoose)
Don't expect a warthog to last long when attacked by a Rocket Launcher, Plasma Launcher or Spartan Laser.
Falcon (aircraft )
The falcon is dubbed the 'warthog of the skies'. It is generally used as a support and attacking vehicle.

Role: Support and Attack
Driver: 1
Passenger: 2 (campaign only)
Gunner: 2 (one each side)
Armaments: 2x ChainGuns
Durability/Strength: Moderate/Strong vs vehicle and light arms
Weaknesses: Large target for anti-vehicle weaponry.
The falcon is the master of the sky, generally being quite durable against ground infantry. And even able to hold off airborne banshees. However it is not advised to use the falcon at close range where Tanks, or anti-vehicle weaponry is used. Falcons are most effectively used to support and protect front line troops or defend an objective.
Scorpion Tank
The Scorpion is one of two tanks in the halo reach vehicle pool, and possesses the most potent direct fire canon as well. As it can deal out and take a lot of punishment it's primary role is that of attacking the enemy.

Role: Attack (and support)
Driver: 1 (operated the main canon)
Passenger: 0
Gunner: 1 (machine gun, can not be used by driver)
Armaments: 1x main canon 1x machine gun
Durability/Strength: Heavy/Strong vs vehicles, light arms and anti vehicle weapons.
Weaknesses: Large target for anti-vehicle weaponry and easily Hi-Jacked infantry.
The Scorpion Tank is the ultimate weapon on the battlefield. Its main purpose is to attack and hurt the enemy very quickly. Although the tank is slow and clumsy, not being as agile as a mongoose or warthog, it's stopping power is the Scorpion's party piece. Keeping enemies far away is vital. Another player can operate the machine gun, which acts as a close range protection for the driver, this can prove the deadliest combination in the game. Tanks should generally have infantry support as well to defend against enemy infantry jack attempts.
The next article will include covenant vehicles. coming soon.
Vehicles fall into a unique category within Halo Reach. Each class of vehicle has a certain role to play at a given time. Generally the classes are Transport, Support, and Primary Attacker vehicles. Beside each vehicle description will be the class it fits into and why.
Vehicles tend to draw a lot of attention when used over a longer time. As such, using vehicles too much will result in them being overcome by a determined team. Plasma pistol charge shots and the emp effect from grenade launchers can stall vehicles.
Human (UNSC) Vehicles
Mongoose
The mongoose is an ATV transport. It has no weapons built onto it. It can carry occupants to locations very quickly. The passenger can fire weapons while riding, but the driver can not. Both passengers are very exposed, hence they are easy to pick off with DMR and Sniper Rifle fire.
Role: Transport (only)
Driver: 1
Passenger: 1
Armaments: None
Durability/Strength: Weak
Weaknesses: Tend to roll easily. No protection for passengers.
This vehicle is for transportation only and has no offensive capability.
The most effective way to use this vehicle is to dash to where you need to go then get off as soon as possible to avoid taking damage. Especially if you are alone you will not be able to shoot back if you stay onboard.
Warthog laag
The Warthog is a supportive transport vehicle. The Light Anti Aircraft Gun (chaingun) Warthog version is intended for anti-infantry and anti-aircraft support. As with the mongoose the driver only drives. The primary gunner operates the main gun. And there is a passenger seat for a third occupant, who can fire as well. The Warthog provides a moderate amount of protection for driver and passenger, with the gunner being exposed.
Role: Support and Transport
Driver: 1
Passenger: 1
Gunner: 1
Armaments: None
Durability/Strength: Weak
Weaknesses: Tends to roll. Large target for Anti-Vehicle weaponry.
The Warthog laag is mainly a support vehicle.
As such the LAAG will overheat if fired too much, and require cooling.
Effective uses of the warthog include circling around the battlefield to catch unsuspecting enemies off guard, generally those who stay out in the open. In objective based games the warthog can be an effective drop-off and pick-up transport for a flag carrier. (although somewhat obvious target and slower than a mongoose)
Don't expect a warthog to last long when attacked by a Rocket Launcher, Plasma Launcher or Spartan Laser.
Rocket Warthog
The RocketHog has the same purpose as the standard warthog, but with much more powerful armaments. This version fires off a full volley of several rockets each time the trigger is pulled, so caution is required.
Role: Support, Transport and Attack
Driver: 1
Passenger: 1
Gunner: 1
Armaments: None
Durability/Strength: Moderate vs light arms
Weaknesses: Tends to roll. Large target for Anti-Vehicle weaponry.
You only see this warthog version in Firefight missions and Custom gametypes, not in standard matchmaking.
Effective uses of the warthog include circling around the battlefield to catch unsuspecting enemies off guard, generally those who stay out in the open. In objective based games the warthog can be an effective drop-off and pick-up transport for a flag carrier. (although somewhat obvious target and slower than a mongoose)
Don't expect a warthog to last long when attacked by a Rocket Launcher, Plasma Launcher or Spartan Laser.
Falcon (aircraft )
The falcon is dubbed the 'warthog of the skies'. It is generally used as a support and attacking vehicle.
Role: Support and Attack
Driver: 1
Passenger: 2 (campaign only)
Gunner: 2 (one each side)
Armaments: 2x ChainGuns
Durability/Strength: Moderate/Strong vs vehicle and light arms
Weaknesses: Large target for anti-vehicle weaponry.
The falcon is the master of the sky, generally being quite durable against ground infantry. And even able to hold off airborne banshees. However it is not advised to use the falcon at close range where Tanks, or anti-vehicle weaponry is used. Falcons are most effectively used to support and protect front line troops or defend an objective.
Scorpion Tank
The Scorpion is one of two tanks in the halo reach vehicle pool, and possesses the most potent direct fire canon as well. As it can deal out and take a lot of punishment it's primary role is that of attacking the enemy.
Role: Attack (and support)
Driver: 1 (operated the main canon)
Passenger: 0
Gunner: 1 (machine gun, can not be used by driver)
Armaments: 1x main canon 1x machine gun
Durability/Strength: Heavy/Strong vs vehicles, light arms and anti vehicle weapons.
Weaknesses: Large target for anti-vehicle weaponry and easily Hi-Jacked infantry.
The Scorpion Tank is the ultimate weapon on the battlefield. Its main purpose is to attack and hurt the enemy very quickly. Although the tank is slow and clumsy, not being as agile as a mongoose or warthog, it's stopping power is the Scorpion's party piece. Keeping enemies far away is vital. Another player can operate the machine gun, which acts as a close range protection for the driver, this can prove the deadliest combination in the game. Tanks should generally have infantry support as well to defend against enemy infantry jack attempts.
The next article will include covenant vehicles. coming soon.
Subscribe to:
Posts (Atom)