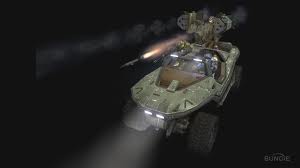
Tuesday, 17 January 2012

Covenant Vehicle Basics

So here is the covenant section of vehicles. Although they are similar in types like support and attack, they use of each vehicle is unique from each, so you will need to practice a bit to get used to how each one works. To use vehicles effectively against smarter human opponents, look out for our upcoming series of video article that will show you the best way to use these vehicles to devastating effect.


Covenant Vehicles


Ghost

The ghost is a quick response ground support unit. It sports a boost function which redirects steering and canon power to speed around the battle field quickly. The driver is somewhat protected from the front, but the back and the sides leave a driver exposed.


Role: Support (and attack)
Driver: 1 (driver operates canons)
Passenger: 0
Armaments: Dual plasma canons.
Durability/Strength: Light: average vs light arms, weak vs anti vehicle weapons.
Weaknesses: Less effective versus tanks and aircraft. Armour lock.


Many operators use the superior agility and speed of the ghost to circle and strafe targets on foot. Even the boost function can be used aggressively to charge through and splatter victims who stray into open ground.
This tactic is now countered by armour lock, so be cautious. Ghosts are very quick when boosting, and can cover the length of a map in little time, much like a mongoose.


Revenant

A Revenant is more of a hybrid between a ghost and a wraith, having the agility and speed of a ghost with it's main weapon being a larger version of the concussion rifle round having the arcing trajectory of a wraith tank shot.


Role: Support (and Attack)
Driver: 1 (driver operates canon)
Passenger: 1 (can shoot hand weapons)
Armaments: Plasma Caster
Durability/Strength: Moderate: average vs light arms, weak vs anti vehicle weapons.
Weaknesses: Less effective versus tanks and aircraft. Armour lock.

The Revenant is used similarly to the way a ghost is used. You can circle and strafe ground infantry. However the main canon will not go toe to toe with heavy tanks and airborne opponents simply because the main weapon is easily dodged.
The Revenant can be used as an objective transporter carrying a passenger in the side seat.


Wraith (Tank)


The Wraith is one of two tanks in the halo reach vehicle pool, and possesses a destructive plasma canon. As it can deal out and take a lot of punishment it's primary role is that of attacking the enemy.


Role: Attack (and support)
Driver: 1 (operated the main canon)
Passenger: 0
Gunner: 1 (plasma repeater canon, can not be used by driver)
Armaments: 1x main canon 1x repeater canon
Durability/Strength: Heavy/Strong vs vehicles, light arms and anti vehicle weapons.
Weaknesses: Large target for anti-vehicle weaponry and easily  Hi-Jacked infantry. Weak versus banshees.


The Wraith Tank is the the Covenant heavy attacker on the battlefield. Its main purpose is to attack and hurt the enemy very quickly. Although the tank is slow and clumsy, not being anywhere near as agile as a ghost or revenant, it's arcing trajectory plasma bombs can be launched mortar style over obstacles and still batter opponents with deadly barrage of plasma. As with the Scorpion tank, a priority is keeping enemy infantry at distance. Another teammate can operate the plasma repeater canon for extra close quarter protection. The wraith does have a limited boost function to allow quick escape from attacks.


Banshee

The Banshee is the quintessential covenant aerial flier. It can boost for a long time and can strafe all targets with ease. Also expect to see operators doing fancy aerial flips to avoid attacks, even the dodging the lock-on of a homing rocket.


Role: Attack (and support)
Pilot: 1 (operates all weapons)
Passenger: 0
Armaments: Dual plasma repeater canons, 1x fuel rod gun.
Durability/Strength: Average/Moderate vs light arms
Weaknesses: Weak strength compared to Falcon, can't shoot directly underneath itself. (blindspot)

Banshees are very deadly in the right hands. They can quickly pick off individuals or groups of enemy infantry. Even ground based tanks can be threatened by a skilled Banshee pilot.

Monday, 16 January 2012

UNSC Vehicle Basics

Vehicles

Vehicles fall into a unique category within Halo Reach. Each class of vehicle has a certain role to play at a given time. Generally the classes are Transport, Support, and Primary Attacker vehicles. Beside each vehicle description will be the class it fits into and why.

Vehicles tend to draw a lot of attention when used over a longer time. As such, using vehicles too much will result in them being overcome by a determined team. Plasma pistol charge shots and the emp effect from grenade launchers can stall vehicles.

Human (UNSC) Vehicles

Mongoose

The mongoose is an ATV transport. It has no weapons built onto it. It can carry occupants to locations very quickly. The passenger can fire weapons while riding, but the driver can not. Both passengers are very exposed, hence they are easy to pick off with DMR and Sniper Rifle fire.


Role: Transport (only)
Driver: 1
Passenger: 1
Armaments: None
Durability/Strength: Weak
Weaknesses: Tend to roll easily. No protection for passengers.

This vehicle is for transportation only and has no offensive capability.

The most effective way to use this vehicle is to dash to where you need to go then get off as soon as possible to avoid taking damage. Especially if you are alone you will not be able to shoot back if you stay onboard.


Warthog laag


The Warthog is a supportive transport vehicle. The Light Anti Aircraft Gun (chaingun) Warthog version is intended for anti-infantry and anti-aircraft support. As with the mongoose the driver only drives. The primary gunner operates the main gun. And there is a passenger seat for a third occupant, who can fire as well. The Warthog provides a moderate amount of protection for driver and passenger, with the gunner being exposed.


Role: Support and Transport
Driver: 1
Passenger: 1
Gunner: 1
Armaments: None
Durability/Strength: Weak
Weaknesses: Tends to roll. Large target for Anti-Vehicle weaponry.

The Warthog laag is mainly a support vehicle.
As such the LAAG will overheat if fired too much, and require cooling.

Effective uses of the warthog include circling around the battlefield to catch unsuspecting enemies off guard, generally those who stay out in the open. In objective based games the warthog can be an effective drop-off and pick-up transport for a flag carrier. (although somewhat obvious target and slower than a mongoose)

Don't expect a warthog to last long when attacked by a Rocket Launcher, Plasma Launcher or Spartan Laser.


Rocket Warthog


The RocketHog has the same purpose as the standard warthog, but with much more powerful armaments. This version fires off a full volley of several rockets each time the trigger is pulled, so caution is required.


Role: Support, Transport and Attack
Driver: 1
Passenger: 1
Gunner: 1
Armaments: None
Durability/Strength: Moderate vs light arms
Weaknesses: Tends to roll. Large target for Anti-Vehicle weaponry.

You only see this warthog version in Firefight missions and Custom gametypes, not in standard matchmaking.

Effective uses of the warthog include circling around the battlefield to catch unsuspecting enemies off guard, generally those who stay out in the open. In objective based games the warthog can be an effective drop-off and pick-up transport for a flag carrier. (although somewhat obvious target and slower than a mongoose)

Don't expect a warthog to last long when attacked by a Rocket Launcher, Plasma Launcher or Spartan Laser.


Falcon (aircraft )

The falcon is dubbed the 'warthog of the skies'. It is generally used as a support and attacking vehicle.


Role: Support and Attack
Driver: 1
Passenger: 2 (campaign only)
Gunner: 2 (one each side)
Armaments: 2x ChainGuns
Durability/Strength: Moderate/Strong vs vehicle and light arms
Weaknesses: Large target for anti-vehicle weaponry.

The falcon is the master of the sky, generally being quite durable against ground infantry. And even able to hold off airborne banshees. However it is not advised to use the falcon at close range where Tanks, or anti-vehicle weaponry is used. Falcons are most effectively used to support and protect front line troops or defend an objective.


Scorpion Tank


The Scorpion is one of two tanks in the halo reach vehicle pool, and possesses the most potent direct fire canon as well. As it can deal out and take a lot of punishment it's primary role is that of attacking the enemy.


Role: Attack (and support)
Driver: 1 (operated the main canon)
Passenger: 0
Gunner: 1 (machine gun, can not be used by driver)
Armaments: 1x main canon 1x machine gun
Durability/Strength: Heavy/Strong vs vehicles, light arms and anti vehicle weapons.
Weaknesses: Large target for anti-vehicle weaponry and easily  Hi-Jacked infantry.


The Scorpion Tank is the ultimate weapon on the battlefield. Its main purpose is to attack and hurt the enemy very quickly. Although the tank is slow and clumsy, not being as agile as a mongoose or warthog, it's stopping power is the Scorpion's party piece. Keeping enemies far away is vital. Another player can operate the machine gun, which acts as a close range protection for the driver, this can prove the deadliest combination in the game. Tanks should generally have infantry support as well to defend against enemy infantry jack attempts.


The next article will include covenant vehicles. coming soon.

Thursday, 12 January 2012

January Update

Hello everybody.

As we are plunging into a new month and new year (as you may have heard),  I've got some updates for you to be aware of that have recently taken place.

  1. The video series of How to Use Armour Abilities Effectively has now finished. Each one included a video or two of some serious in-game action that focused on each of the particular armour abilities. If you missed them they can be found on the Homepage or on the Basics and Advanced page under the armour abilities sub-heading.
  2. The Basics and Advanced page has been updated to include all the above mentioned armour ability links to their corresponding articles.
  3. The Merchandise and Games pages are available to view via the menu bar, but the pages themselves are still in a state of flux. Changes will be taking place soon.

With those updates in mind what is on the horizon?

Well the primary focus for upcoming weeks will include adding vehicles to the Weapons and Vehicles page. And with the addition of including the vehicles I may include some useful articles on how to use the them effectively as well. So watch out for some cool new images, photos and descriptions of all the Halo Reach vehicles that the game has to offer.

And looking ahead to Halo 4, only some details have come through about it so far, referring of course to the teaser trailer and official concept artwork of last year. But be assured that when something interesting pops up I'll do my best to shove it into your faces asap so you don't miss a thing.

Well that's all for now.


How to Use Drop Shield Effectively


Drop shield is intended as a defensive and healing ability. When used effectively a player can time it very well to protect an objective or to save himself or his team from immediate danger. Like the video above shows: the user throws down a quick drop shield just before the red attacker fires a rocket. The rocket splash kills the red player whilst the blue player remains alive.
Of course if you find yourself low on health and not under attack, it is a good idea to throw a drop shield down to obtain full health once more.
Remember that drop shield only heals the health, not the shielding, of any player(s) within its bubble.

Tuesday, 10 January 2012

How to Use Evade Effectively


Evade can be used defensively to get away when under fire. On the offensive, quick strike and retreat tactics can prove deadly, especially on opponents caught out in the open, like in the top video. When attacking a well-guarded room, a quick evade through an enemy position can provide a big distraction for your team. Or just to cover ground quickly evade proves very useful.